Managing Remote Servers and Remote-Tracking Branches

../_images/sidebar-remotes.png

Remotes in the Sidebar

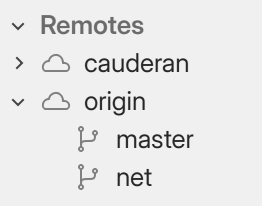
All of the remote servers added to your repository are listed under Remotes in the sidebar.

In turn, remote-tracking branches are listed under their respective remotes.

Adding a new remote

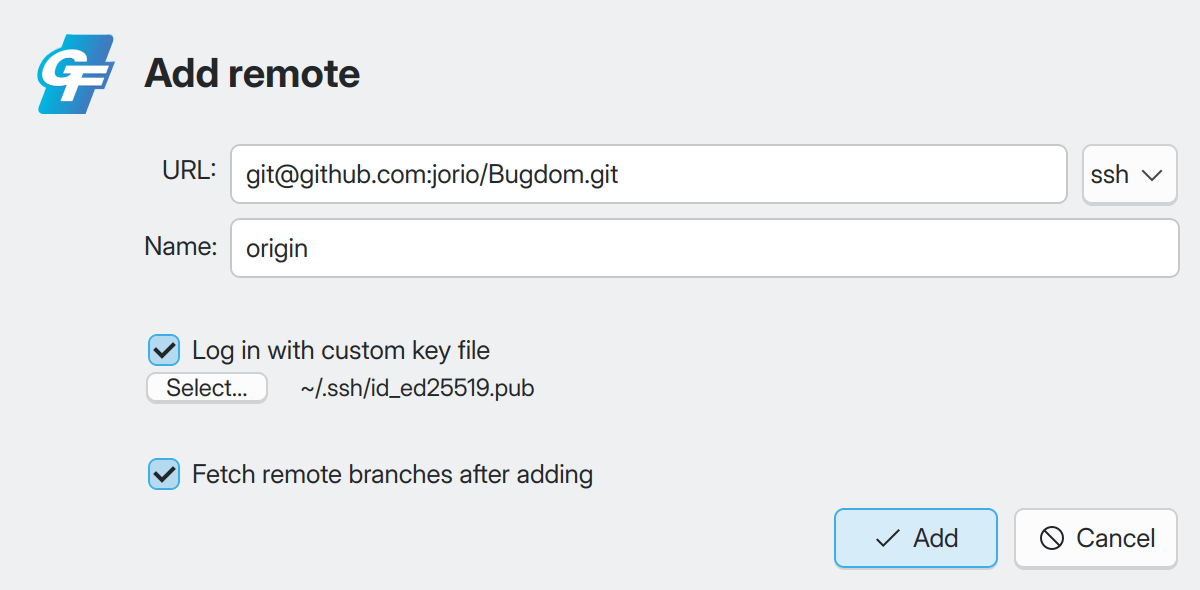
Right-click on Remotes in the sidebar and select Add Remote (or just double-click on Remotes) to bring up the “Add Remote” dialog:
../_images/addremote.png

The Add Remote dialog.

Fields in the Add Remote dialog

Item

Description

URL

The URL will be used to fetch from, and push to, this remote. GitFourchette automatically fills in the URL from your clipboard if possible. You can use the ssh/https button to convert the URL to another protocol.

Name

You can name the remote however you want, bar some restrictions. GitFourchette will let you know if the name you’ve entered isn’t compliant.

Log in with custom key file

By default, GitFourchette automatically looks for a matching key in your ~/.ssh directory if the remote requires authentication. Log in with custom key file lets you bypass automatic key detection and specify which key file to use to connect to this remote.

Note

Log in with custom key file is particularly useful if you have multiple repos requiring different credentials—for example, if you juggle between two accounts for personal use and for work.

Sorting remote-tracking branches in the Sidebar

Like local branches, remote-tracking branches can be sorted in the sidebar:

  • by their name, or

  • by the date of the latest commit at the tip of each branch.

To select a sorting mode, right-click on Remotes in the sidebar and pick an option under Sort Remote Branches By.