Advanced Commit Techniques
Setting aside your commit message for later
If you back out of the Commit dialog by clicking Cancel, GitFourchette will save your message as a draft. The draft message is shown in the Working Directory row at the top of the Commit History.

A commit message draft as shown in the Commit History.
Next time you press the Commit files button,
the Commit dialog will fill in the commit message with your draft.
To clear the draft message, right-click Working Directory in the Commit
History, then choose Clear Draft Message.
Amending a commit
If you’ve just made a commit and you realize you’ve made a mistake in it, you can amend the commit. Amending updates the contents and/or metadata of the HEAD commit.
Warning
Attention Beginners! Use “amend” ONLY on a commit that you haven’t pushed yet! If you’ve already pushed a commit to a remote, DON’T AMEND IT and fix your mistake in a new commit instead.
GitFourchette won’t stop you from amending a commit that has already been pushed, because this is a legitimate use case if you really know what you’re doing. However, you run the risk of the remote rejecting your amended commit next time you push. And while force-pushing is an option, it’s extremely dangerous because it may cause data loss in your repo or for your teammates.
If you’re at all unsure, steer clear of the Amend feature until you’re more confident with Git.
To amend the HEAD commit:
First, stage any additional changes you’d like to roll into the HEAD commit. (If you simply want to edit the HEAD commit’s message, you can actually leave the Staged box empty here.)
Click the pulldown arrow attached to the right of the
Commit files button. In the menu that appears, choose Amend latest commit. (Or just press Ctrl Shift S.)
The “Amend Commit” window appears. It’s very similar to the “Commit” dialog we’ve walked through earlier. One key difference is that “Amend Commit” fills in the message of the HEAD commit for you. You can leave it be, or you can edit it.
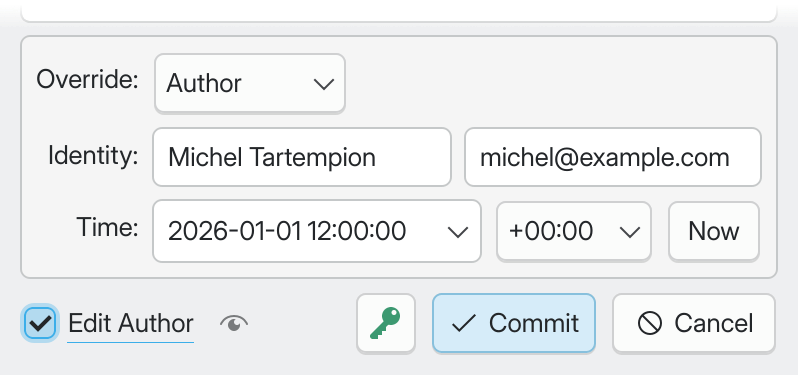
By default, the original commit’s author information will be left intact, but
the amended commit will automatically record you as the committer. You can
customize this via Edit Author and preview the result with the eye
button (, see Editing a commit’s author or committer).
Note
To be exact, amending doesn’t really modify the existing commit. Remember, commits are immutable: each commit is identified by a unique hash of its contents and metadata (message, author, etc.). So, amending actually produces a new commit, then rewrites history to “replace” the HEAD commit.
Cherry-picking a commit from another branch
Cherry-picking lets you bring a single commit from another branch into your current branch. This is useful to obtain changes from another branch without merging it in (when you’re not interested in the rest of the branch).
To cherry-pick a commit, locate it in the Commit History, right-click it and choose Cherry-Pick in the context menu. GitFourchette will apply the changes from the commit to your working directory.
Your repository will enter the special “cherry-picking” state, as shown by a banner below the Sidebar. In this state, some operations are restricted, so you should conclude the cherry-pick as soon as possible. To conclude the cherry-pick:
If cherry-picking was successful (as indicated by a green banner below the Sidebar), you should conclude the cherry-pick by committing the cherry-picked changes. GitFourchette encourages you to do so immediately after a successful cherry-pick.
If cherry-picking caused merge conflicts (as indicated by a yellow banner below the Sidebar), you will have to resolve the conflicts first. Read Resolving Merge Conflicts for more information.
Note
You’re free to stage additional changes before concluding the cherry-pick, for example if you need to adjust some code to the incoming changes.
If you change your mind, you can get your repository out of the “cherry-picking” state by clicking Abort Cherry-Pick in the Cherry-Picking banner.
Warning
Aborting a cherry-pick will discard all staged changes—whether they originate from the cherry-picked commit or not!
