Exploring the Commit History
The Commit History displays a list of commits in the repository, along with a graph to visualize how the branches evolve.
You can left-click on any commit to
explore its contents,
or
right-click to perform an action with the commit.
Tip
Press Alt 2 to get keyboard focus on the Commit History.
Overview of the Commit History
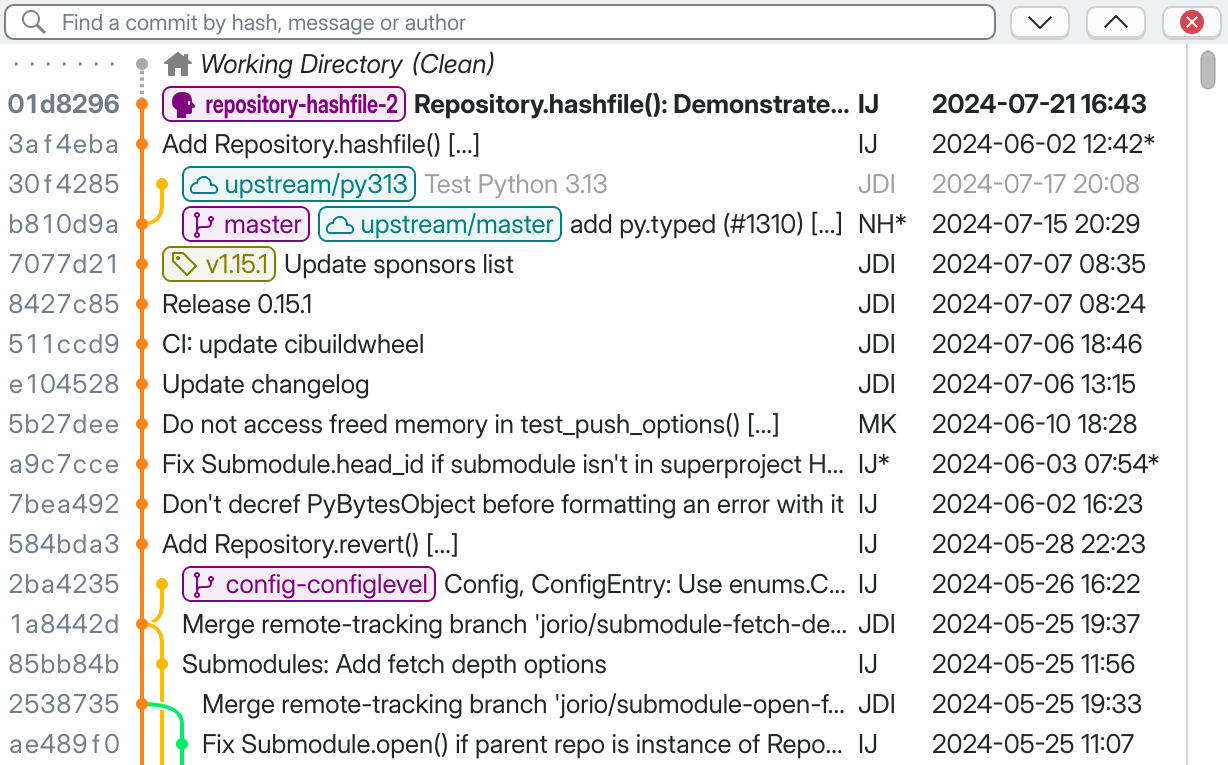
Hash: The first few characters of the commit’s SHA-1 hash. It uniquely identifies the commit.
Graph: A visualization of the branches at this point in history. The dot represents the commit itself.
- Ref Boxes: Colored boxes shown for each reference to this commit by:
The tip of a local branch, in purple, e.g.

The tip of a remote branch, in teal, e.g.

Tags, in yellow, e.g.

Commit Summary: The first line of the commit message. An ellipsis (…) indicates that the message is truncated; hover over it to reveal the full message in a tooltip.
Author Name/Date: Who created the commit and when. See Author vs. Committer.
Search Bar: Bring it up with Ctrl F when the Commit History has keyboard focus. See Finding a commit.
Note
You can customize the appearance of some of these items in
.
For example, you can tweak:
Author column: full name, last name only, initials, email, etc.;
Date/time formats: ISO, U.S., European, etc.;
Row spacing and alternating background color…
Finding a commit
The Commit History has a Search Bar.
Press Ctrl F to invoke it (the Commit History must have keyboard focus).
Start typing, and a yellow highlight will appear in matching commits.
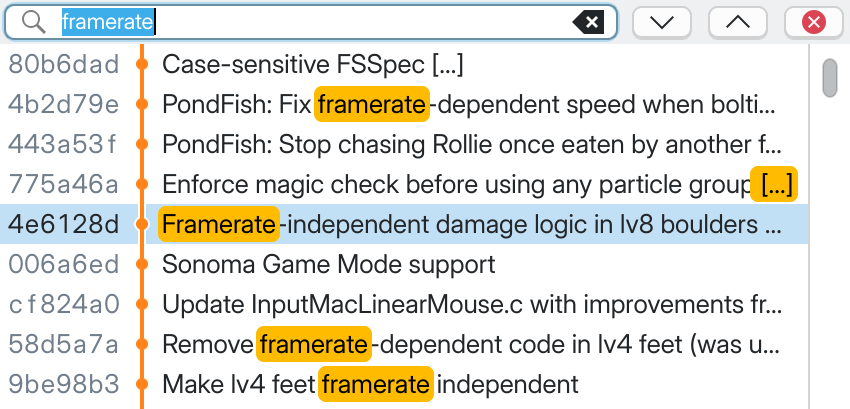
Searching for a word in the Commit History.
You can search for:
The first couple characters of a commit’s SHA-1 hash.
Any part of a commit message. If the search term is found beyond the first line of the message, the ellipsis (…) will be highlighted in yellow.
A commit’s author name.
Tip
Note
Search is limited to the commits loaded in memory.
To find an old commit in a long-lived repository, you may want to review
.
Exploring the changes in a commit
Once you’ve selected a commit in the Commit History, the lower half of the main window is dedicated to exploring the contents of the commit.
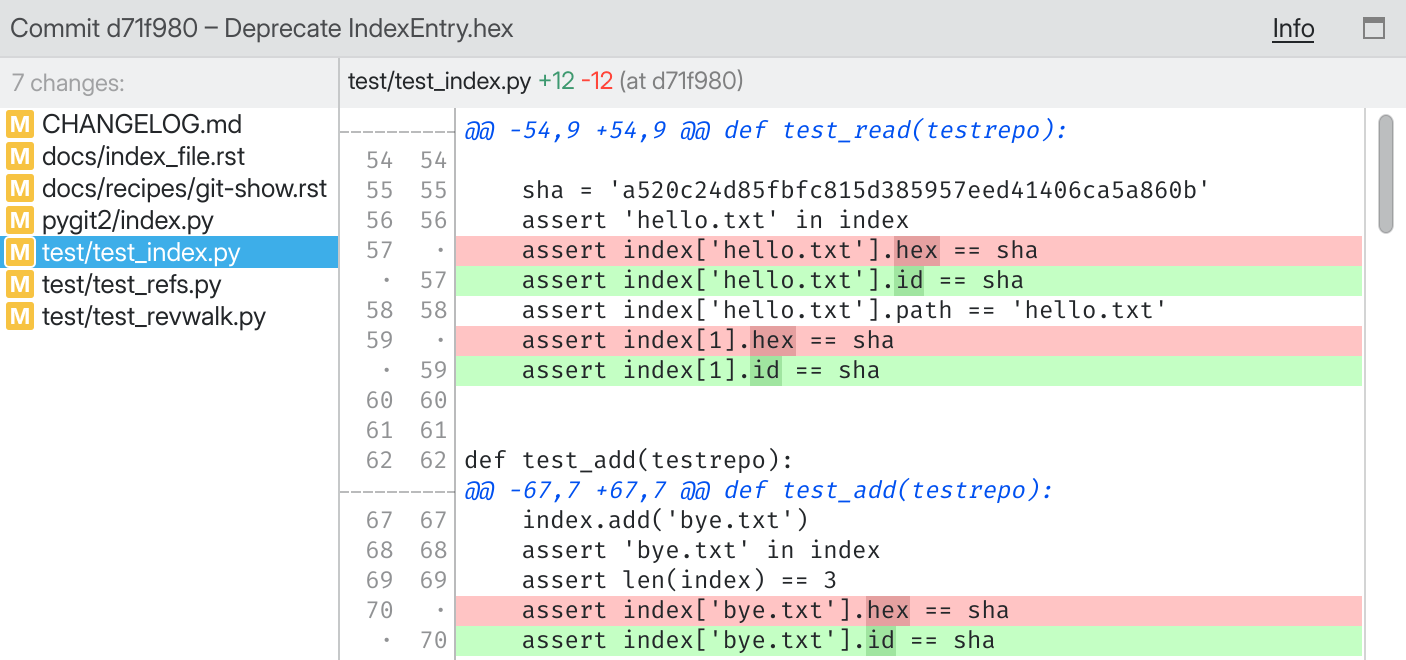
- Header: The first line in the commit message.Click Info to view detailed metadata about the commit.Click the
maximize button to expand the Commit Explorer.
- File List: All files modified by this commit in relation to its parents.
Left-click on a file and the Diff View will show what’s changed in it.
Right-click on a file to open a context menu with advanced operations.
- Diff View: Displays the changes introduced by the commit in the selected file.The Diff View is covered in detail in its own chapter: Reading and Editing Diffs.
Returning to an item you’ve previously visited
As you navigate your repository, GitFourchette keeps track of where you’ve been. Much like a Web browser, you can go “back” and “forward” among the items you’ve viewed recently.
To return to an item you’ve previously visited, use the Back
and
Forward buttons in the Tool Bar, or press
Ctrl ← and Ctrl →. You can also use your mouse’s back/forward buttons.
Advanced: Chronological vs. Topological sorting
Out of the box, the Commit History displays commits in chronological order.
You can switch to topological sorting in
.
Chronological mode lets you stay on top of the latest activity in the repository. The most recent commits always show up at the top of the graph. However, the graph can get messy when multiple branches receive commits in the same time frame.
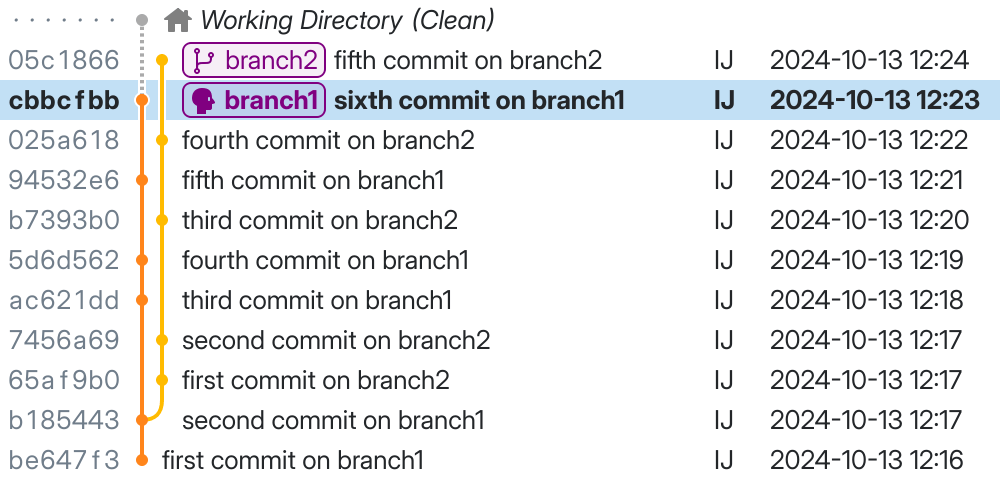
Chronological mode. New commits trickle into the graph in the exact order they are being made, but the intertwining of branches can get messy.
Topological mode makes the graph easier to read. It attempts to present sequences of commits within a branch in a linear fashion. Since this is not a strictly chronological mode, you may have to do more scrolling to see the latest changes in various branches.
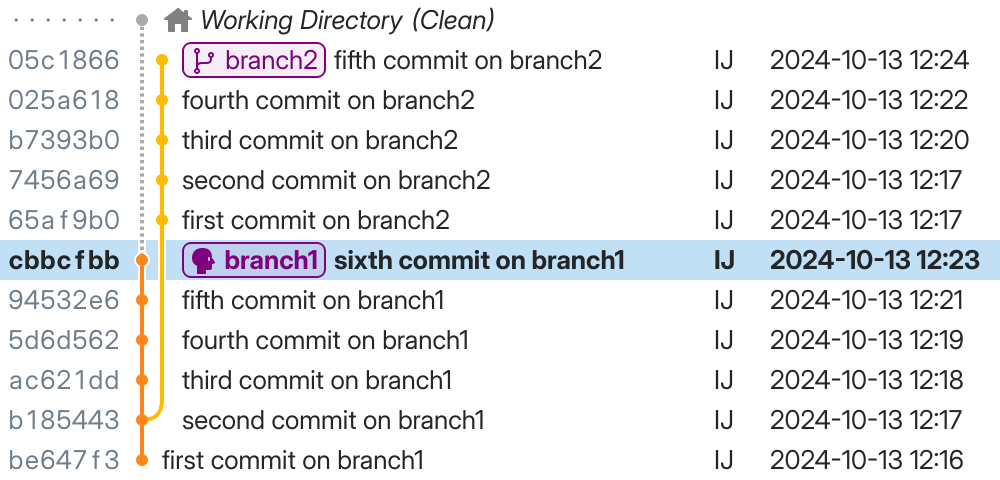
Topological mode. Commits are neatly grouped according to the branch they belong to, but chronology isn’t respected across different branches.
