Managing Changes in the Working Directory
This chapter will teach you some techniques to manage and edit your uncommitted changes so you can prepare commits with more precision. We’ll assume you’re already familiar with staging and unstaging files (see Making a Commit).
Staging and discarding individual hunks or lines
Sometimes, you might be ready to commit specific parts of a file—but you might still be working on other parts of that file.
Fortunately, you don’t have to stage the entire file every time you want to make a commit. The Diff View lets you stage small pieces of code in a file:
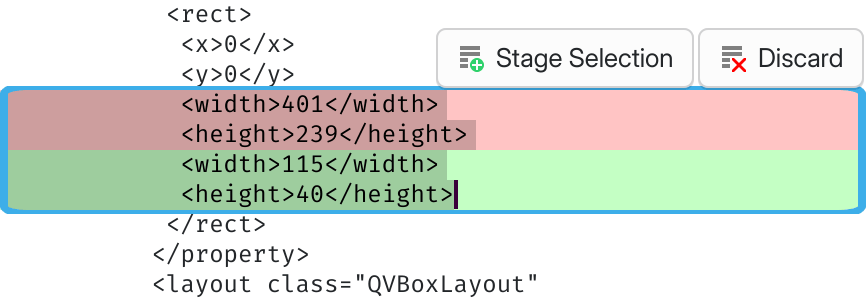
You can stage a single hunk without staging the full file.
You can even stage individual lines if a hunk isn’t granular enough.

Hand-picked lines ready to be staged in the Diff View.
Stashing changes
If your working directory contains changes that you’re not ready to commit yet, you can stash them. Stashing safely tucks away your changes to a stash, then it restores the affected files to their unchanged state. When you’re ready to resume working on the stashed changes, you can apply the stash back to your working directory.
This is handy when you want to reset your working directory to a clean slate without losing work in progress.
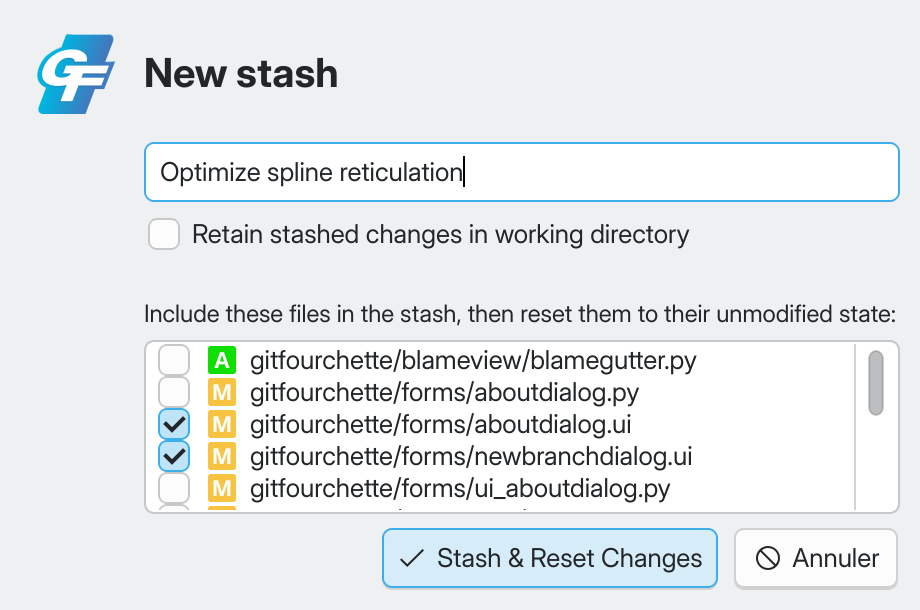
To create a stash, go to ; or, select some files in the File List, right-click and choose Stash Changes. This opens the “New Stash” dialog where you can customize the contents of the stash before confirming:

The New Stash dialog.
Item |
Description |
|---|---|
Optional stash message |
Describe the contents of your stash here. Or not—it’s up to you. Stashes are meant to be temporary, so this message is optional. |
Retain stashed changes in working directory |
Unticked by default, since the most common use case for stashes is to set aside some work in progress and clean up your working directory. Tick this if you want to stash the changes and keep them in your working directory anyway. |
Files to stash |
Select the files to include in the stash. Unticked files will not be part of the stash and will remain in your working directory. |
Your new stash appears in the Sidebar’s Stashes
section. To restore a stash to your working directory, right-click on it in the
Sidebar and choose Apply.
Warning
If you stash a file that contains both staged and unstaged changes, those will be “flattened” in the stash.
Note
Stashes are only saved locally on your machine. They cannot be shared with others (unlike “shelves” in Perforce).
Tip
Press Ctrl Alt S to create a new stash.
Rescuing changes that you discarded by mistake
Did you mistakenly Discard some change
that you actually meant to keep?
Don’t panic—GitFourchette backs up the last 250 discarded changes by default. Go to and your system’s file manager will reveal the trash folder.
In the trash, discarded changes are stored as .patch files that you can apply to your working directory. To do so, drag-and-drop a patch file from your file manager to GitFourchette’s main window.
Applying the patch might fail if your working directory has evolved too much. In this case, try applying the patch with git apply (unfortunately, GitFourchette’s patcher is a bit brittle for now and vanilla git apply is more robust).
Note
You can customize how many files to keep in the trash in .